Friday, January 6, 2012

GB's QB's (Quinoa Burgers)

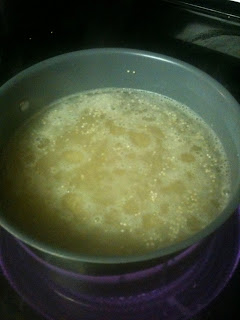
Making quinoa!

Roasting the Spices

Adding to mix

time to blend!

Looking good, smelling amazing!

Hand Mix the Quinoa in!!

Ready to Chill!

Patty form, covered with nutritional yeast

Finished Product!!

yummy!

Good job!!

aww, she was soo little and loving QB's then too!!

  On those days when I look in my pantry and I am drawing a blank for what to make for dinner, my hubby's quinoa (pronounced keen-wah) burgers come to the rescue.  I will admit the first time my hubby was making these one night, I said to him, "you really think the kids are going to eat that?"  I was thinking okay he is going to make dinner but I will have to make the kids something else to eat, a big headache.  Well, if he had a camera on hand he would have taken a picture of the shock on my face when my kids were both eating it up and asking for seconds!!!  Getting asked for seconds is the closest thing to a miracle in this house and it wasn't ice cream (vegan of course), it was a healthy yummy dish!!  These are the easiest things to mix up, store, and have on hand in the fridge the whole week so you can have fresh "burgers' on demand!!!  These are filled with yumminess and goodness, so you feel absolutely no guilt for enjoying, that is until you start topping it, then it could go a little haywire;)  Anyways, if you have never used quinoa before, it is so easy to make and use in dishes, not to mention it is a complete protein and amazing for you!!!  The most important part about this dish is to dry roast the spices at medium heat for only 5 mins, these can go from fragrant to burnt fast.  So the second you start to smell the aroma, pull off the heat.  We also use our food processor to mix everything and then hand mix in the quinoa, that way we have a bit of texture in the burgers.  You really need to refrigerate these for at least an hour (preferably 2) so they have time to firm up.  We usually griddle them up with a little earth balance and coat the burgers with nutritional yeast, and mmm... they crisp right up.  My kids love to eat these plain with a Goddess dipping sauce (a.k.a. salad dressing from Trader Joe's, and if you have never had, get some, the stuff is delicious!!)  These are amazing to eat plain, on a bun, wrap, bread, you name it it's all good.  The best part about these is they are the BEST foundation to create the perfect meal, knowing that you have a great start, there is no way to not have a delicious finish, and who doesn't love burgers!?!  Vegan ones that is!!!!

GB's QB's

1 1/2 cup cooked Quinoa
1/2 cup black beans or hummus
1 TBSP. Tomato Paste
2 TBSP. Flax seed
2 TBSP. Bragg's
1 tsp. basil and thyme
1/2 cup Old Fashion Oats
Dry Roast:1 tsp. Coriander1/2 tsp. Paprika, Garlic, Cumin
Nutritional Yeast for coating
Olive Oil for frying

Cook the quinoa and set aside.  In a food processor add all the ingredients and blend until well mixed, adding a little bit of water if too thick.  Dry roast the spices for 5 mins, careful not to burn, add to the mixture.  Stir in the quinoa by hand. and refrigerate for 2 hours.  After this form the mix into patties, coating both sides with nutritional yeast and fry on a medium heat griddle with a little bit of olive oil.  Enjoy!!

Tuesday, January 3, 2012

Pizza, Pizza!!!


Supplies!
Ready to Spread!

Dough ready to go!

Garlic "Butter" Spread

Making the crust YUMMY!

Sauce Time!!

Decorate Me Please!!

Extra Cheese on this one!!

Kale and Garlic Sprinkles!

Time to Eat!!
I cannot believe that I have had a blog for over a month and have not talked about our semi-homemade pizza!!!  This has to be one of our favorite meals hands down, my kids love it and I love making it because it's so simple.  I mean who doesn't love pizza it's such a classic pairing of yummy food!!  Seriously you can just forget ordering from the pizza shop, this tastes a hundred times better and is sooo much cheaper (music to my ears!!)  It all started when I was in Trader Joe's one day and I came across pre-made dough in a bag  that was 99 cents and vegan (its now a dollar and some change, but still worth it)!!!  I couldn't believe my luck, I remember as a kid my mom always used to do homemade pizza and it always tasted so good and was so much fun to make and then eat:)  So, I bought about five bags to test out and the rest is history.  I will buy at least 10 bags at a time (they look at me crazy, but I look at it as smart).  That way we are always able to have pizza, Stromboli, or garlic bread whenever we want!!  Tip: When freezing place on a flat surface otherwise it wraps around stuff, freezes, and gets stuck and takes hours to get undone,  no fun!
     I once read somewhere that if you wanted to lose weight you could only have pizza once a month, well that woman obviously had no kids and in this house it's more like once a week or so and can be lunch or dinner, we're flexible.  I always said that having my kids grow up vegan they were not going to be those kids that were left out and not able to be a "kid" eating the good stuff.  So we've adapted and with a little planning ahead, if I know there will be pizza at a party or dinner at my mom's or wherever, I will bring my own pizza and my kids have no problem feeling like all the other kids.  When my son was younger I used to let him have pizza with all his cousins, but I just knew I didn't want him to have all that Dairy or "cow's milk cheese" as my son now calls it and I know his tummy is thanking us for ridding him of the nastiness!!!
     I used to make pizza using just the dough from TJ's, pasta sauce and veggies, but as I became fond of Daiya, a Vegan cheese, I started using the mozzarella type shreds.  Let me tell you the story of this cheese because I first bought a bag of mozzarella and wasn't sure what to expect.  Well, let me just say after using the whole bag in some lasagna, I was not ever going to buy this again because it was awful and way too overpowering.  Little did I know that with Daiya cheese a little goes a long way, which is good news because at almost 5 dollars a bag its pricey.  Slowly I have begun to make pizza with the daiya cheese and topping with Kale and a sprinkling of garlic which gets super crispy on top!! It's delicious and my kids are getting more green veggies, love it!!!
     I always start by leaving the dough out to rise and thaw all day long(from frozen), that way it is super easy to spread out the dough.  It says only 30 mins(from the fridge), but I suggest at least an hour or two to be able to really spread without too much trouble.  I also always use the silpat or parchment paper because it sticks to everything and there is nothing worse than making a delicious pizza and not being able to eat because you can't get the bottom unstuck:(  Then I melt some earth balance vegan butter, with basil and garlic, and brush the edges to give some extra flavor, spread the sauce. and top with whatever you are feeling or have in the fridge.  Kale is a great addition, we used to do spinach, but it made it a bit to soggy.  Bake at 350F for 20 mins and then turn up to 400 for an extra 5 or 10 mins to crisp up the Kale, and eat up!!!
    So to sum up, you can put anything on this thing and it will be good, when I made without cheese my kids didn't even notice, but I like to spoil them occasionally (or all the time as my hubby says:)  and let them eat their Vegan Cheese to their hearts desire!!!  I just want my kids to never feel like they are missing out because they are vegan because this is the most amazing way to live and I want them to LOVE it too!!!

Vegan Pizza
1 bag Trader Joe's pre-made dough (in fridge section, by the meals to go area)
3/4 cup tomato sauce
1/2 - 1 cup Daiya Cheese (or omit depending on your preference, if its your first time using, less is more!!!)
1-2 cups Kale
sprinkle of Garlic Powder
and add any additional veggies you like!!!

Bake at 350F for 20 mins and then 5-10 mins at 400F, Enjoy!!!
Here's some pics of all our varieties!!!

No Cheese!!
The Works No Cheese!!


Stromboli!!
Yummy!! with vegan "meatballs"
The Green Giant, broccoli, spinach, olives, peppers!  
Green Giant up close!!

Garlic Cheesy Bread, no sauce!!

Sausage and Kale anyone??

Sunday, January 1, 2012

Happy New Year and a Yummy Coconut Cake!!!

Happy New Year to everyone!!!  Wow, time just keeps flying by and I cannot believe it is officially 2012!!!  It is so exciting to begin the new year feeling like anything is possible for this next year!!  I hope that this year I am able to make more yummy dishes that my kids love and try to up the plant happiness in this house!  I decided to celebrate the new year with a cake because it just felt like the time was right and I wanted to start a type of tradition for the kids that we all get together and figure out what we will try to be better at this year.  My three year old said he would be "more helpful", (he is just the sweetest), my 1 year old is not quite ready to let us in on her's and my hubby said "eat more veggies."  Gotta love these since they are not too daunting, but achievable and we will be doing!!!!  I am going to try to be more patient, with my kids and life in general, stop and smell the roses as they say, and of course to blog and share this delicious vegan food that we are enjoying with all of you and maybe inspire a change in you and your family!! Happy New Year!


The Original!
Now to the good part, a vegan coconut cake with my "bettercream" frosting, coated with coconut and served with a glass of cold plant milk! Warning this cake is extremely rich and yummy, and can be addicting!  I am not going to actually post the recipe as it is from the cookbook, Sweet Vegan by Emily Mainquist, and by the way, the book is amazing, get it!!!  I definitely wish I could take credit, but no such luck, if you want the recipe, send me a message and I can send it that way.  Coconut cake has always held a special place in my heart because I spent my 12th birthday with my late grandparents in Hawaii and my grandmother had this cake and I will never forget it (or her!!!) I have been on the hunt for it ever since, even when we returned for my 21st birthday, we tried to find it, but no such luck.  This cake was something you can only dream about, light and fluffy cake with frosting that was delicate and not too sweet, mmm... everything just worked perfectly together....  Well I am happy to say that this is the only cake that has even come close to the original and it's worth every minute of making!! It is a fairly simple recipe, the key to achieving the fluffiness in my opinion, is to mix it properly with enough whipping in between each addition of ingredients.  It is a three layer cake but due to my faulty cake pan, I only successfully removed 2 out of 3, which would have been really upsetting normally, but I think it was just as yummy with two layers and bonus, we got to sneak a taste:)  I waited for the cake to completely cool and then frosted and covered until the next day, before singing happy new year to the tune of the birthday song, finishing up with my kids getting to blow out candles for the new year!  I love that I can start to have fun little traditions that help to celebrate our blessings and important moments in our lives.  Wishing you all the best this year!!  Lots of Love,
Mai

Supplies!


The beginning

Wet and dry ingredients!

Cake Batter, MMM!!!

Ready to Bake!

Mai's "Bettercream" Frosting!!

Cakes Baking!!

Cakes Cooling!!

Frosting!!

Finished Product!

Ingredients:

1 cup (2 sticks) dairy free margarine, at room temperature
2 cups sugar
2 cups coconut milk (1 can)
2 tablespoons apple cider vinegar
1 teaspoon pure vanilla extract
1 teaspoon coconut flavoring
3 cups flour
2 teaspoons baking powder
1 teaspoon baking soda

Mai's "BetterCream" Frosting 
(recipe in Mai Mai's Sugar Cookies Post)

Topping: ½ cup flaked, sweetened coconut

Directions:

Preheat your oven to 350 degrees. Grease and flour two (or three) 9-inch cake pans.

Using an electric mixer, cream together margarine, sugar, coconut milk, vinegar, vanilla, and coconut. Cream well for 6 to 8 minutes. In a separate bowl, mix together the flour, baking powder and baking soda. Add flour to creamed mixture, beating until just mixed. Divide batter equally among prepared pans. Level batter in each pan by holding pan 3 or 4 inches above counter, then dropping it flat onto counter. Do this several times to release air bubbles and assure you of a more level cake. Bake for 25 to 30 minutes or until done. Cool in pans for 5 to 10 minutes. Invert cakes onto cooling racks.

Cool completely. In the meantime prepare frosting. Fill and spread cake layers with frosting and garnish with coconut flakes. Cook’s Note: As each layer is stacked, you can stick them with toothpicks to prevent cake from shifting (just be sure to warn your guests).